

Passport JS
Passport JS is a widely popular authentication module for Node js. The sole purpose is to authenticate requests and is based on the idea of pluggable authentication strategies ( including local strategy, there are more than 500 strategies currently available ).
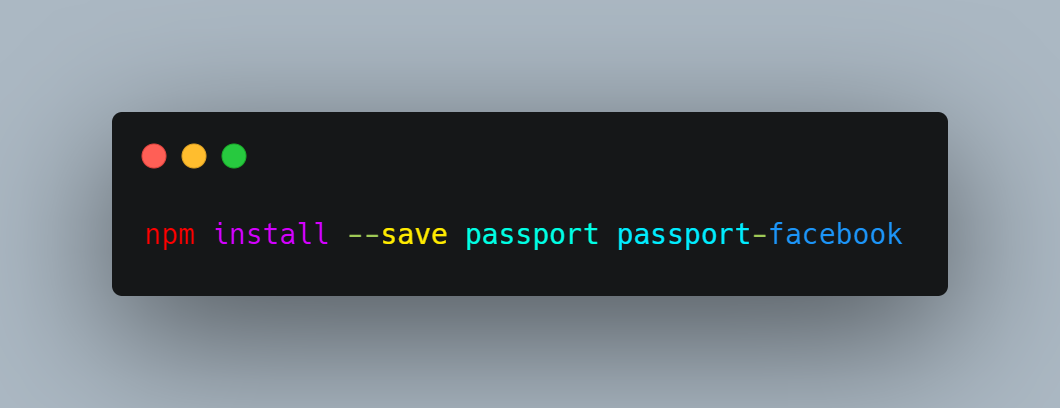
When using third party application Your app never receives your password thus freeing the developer from the burden of security related to handling and storing passwords. The Passport authentication and its strategy will include protection against attacks like “man in the middle” and other vectors an attacker might exploit. We are going to use Facebook strategy, for now, to install Passport and Facebook strategy type in the following command:
Next, we are going to write the authentication code, and we’ll be creating a different module called lib/auth.js. This is going to be a large file so we are going to see step by step:
- We’ll start by using two methods that Passport requires, serializeUser and deserializeUser:
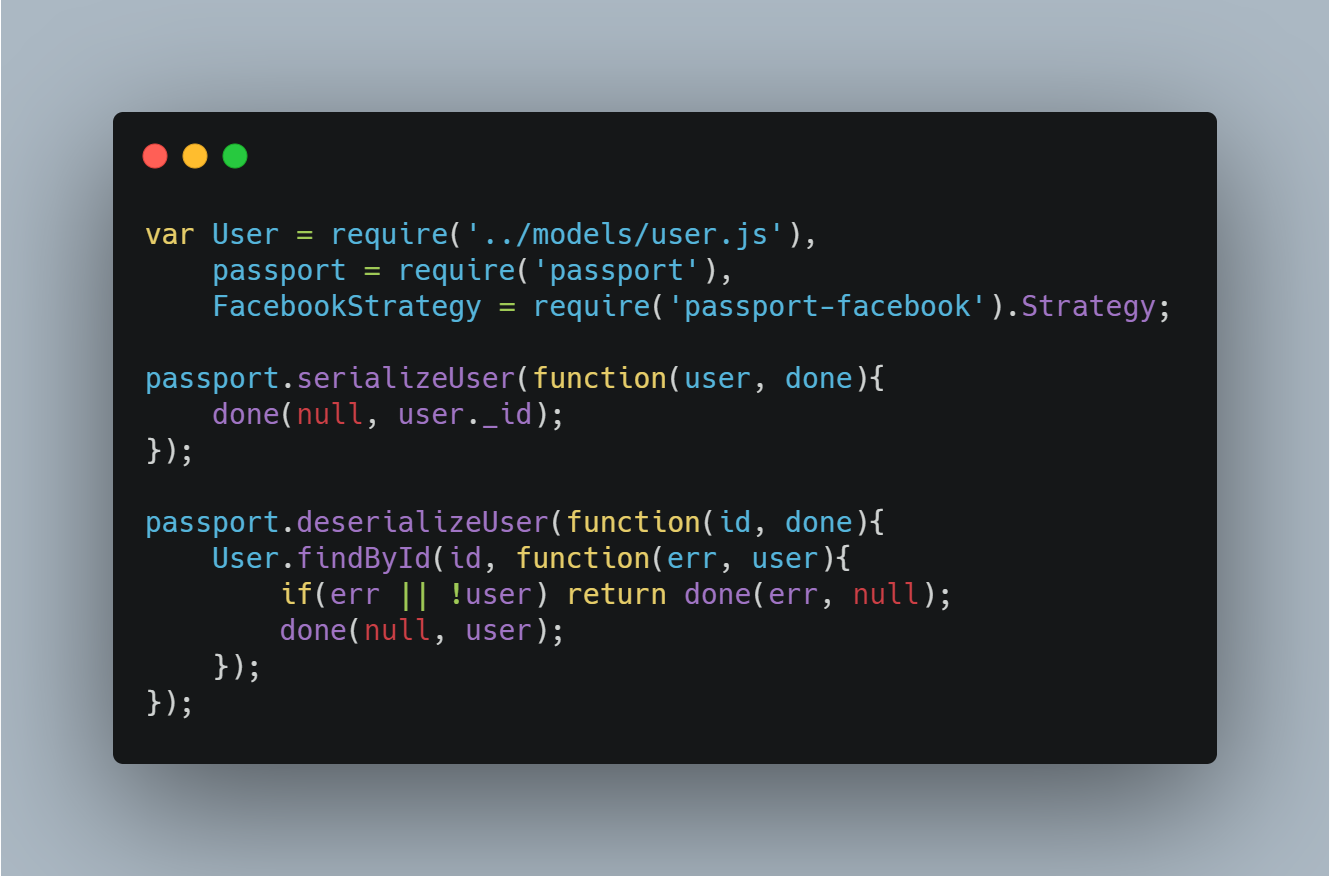
These two methods are used to map requests to the authenticated user, allowing whatever storage strategy you want to use. In our case, we are going to store the MongoDB assigned ID (i.e _id property of User model instances). Once these two functions are implemented and there is an active session, the user has successfully authenticated.
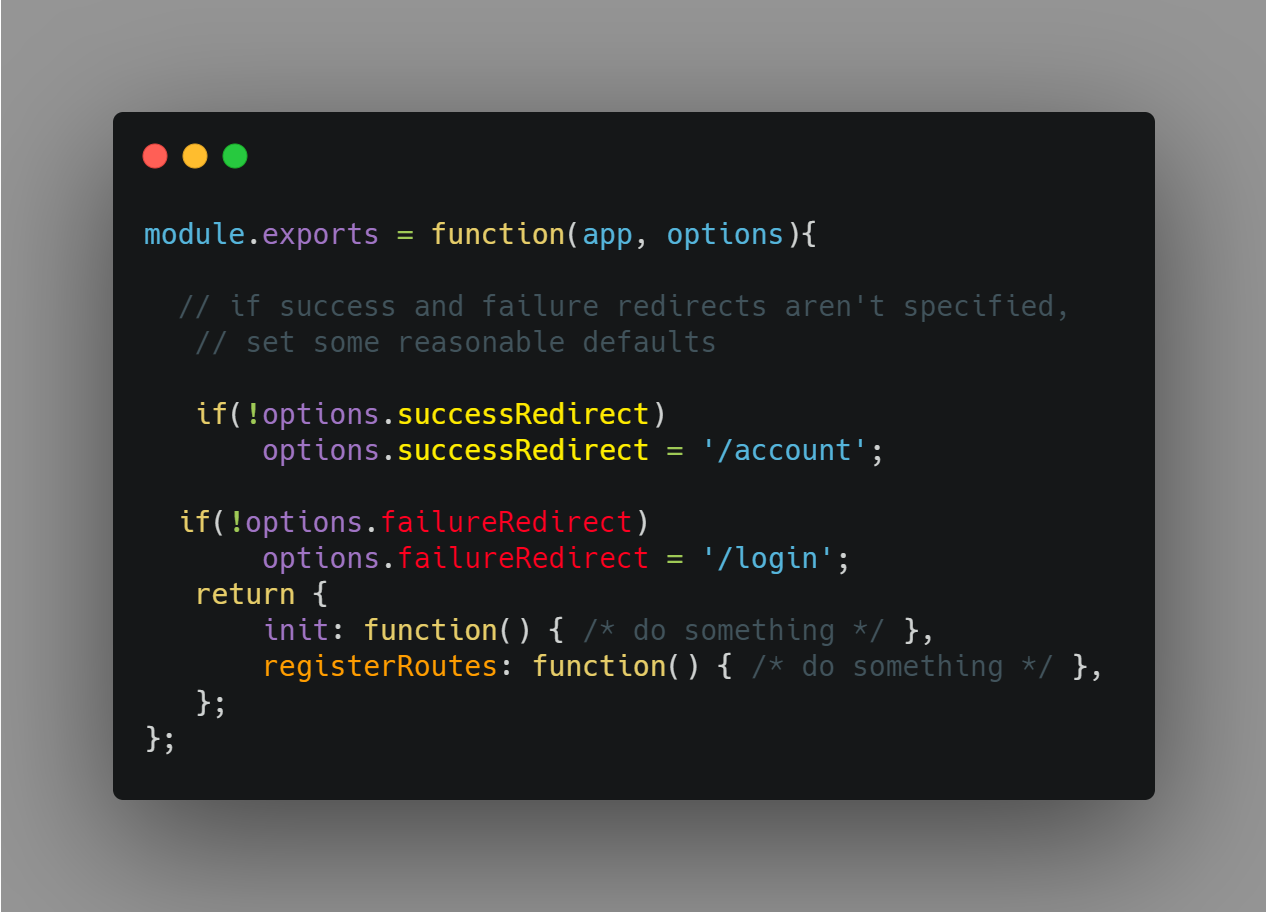
Next, we’re going to export. To enable Passport’s functionality, we’ll need to do two distinct activities: initialize Passport and register routes that will handle authentication services. The following code defines that:
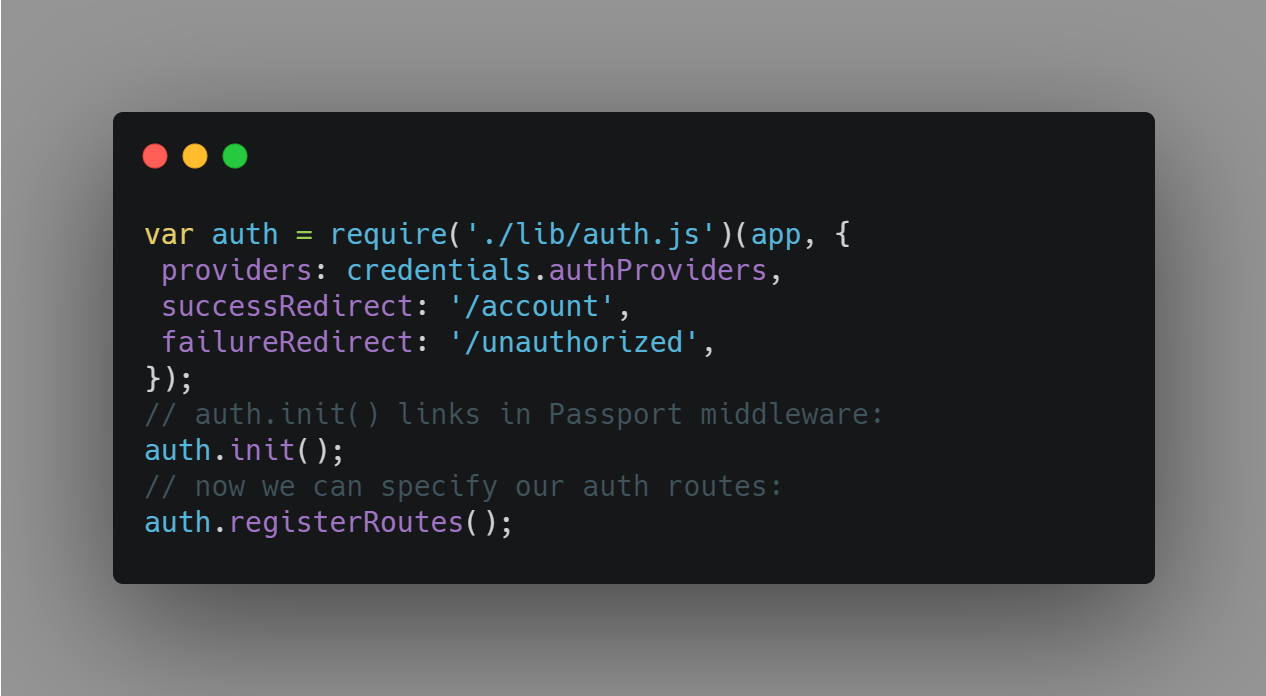
Next, we’ll add authProviders to credentials.js:
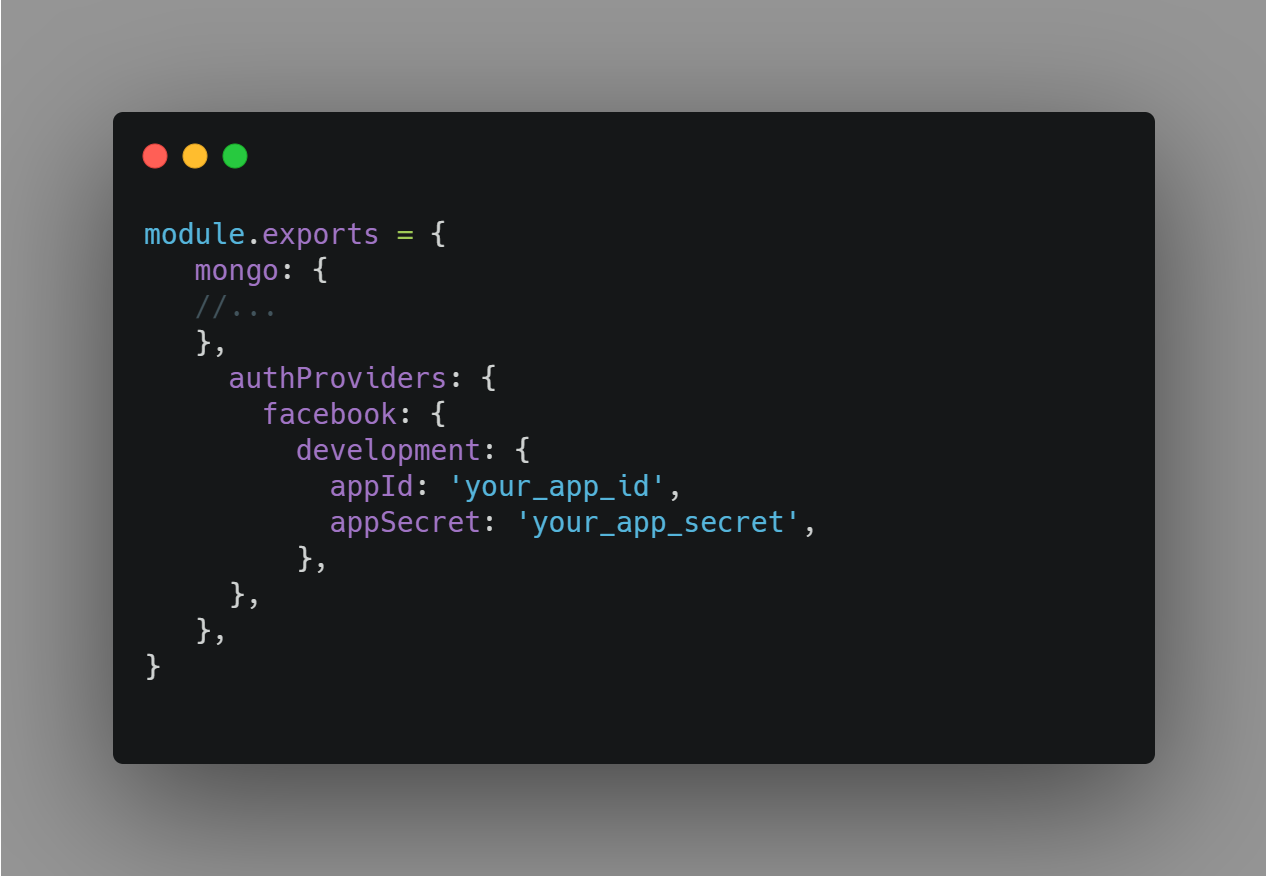
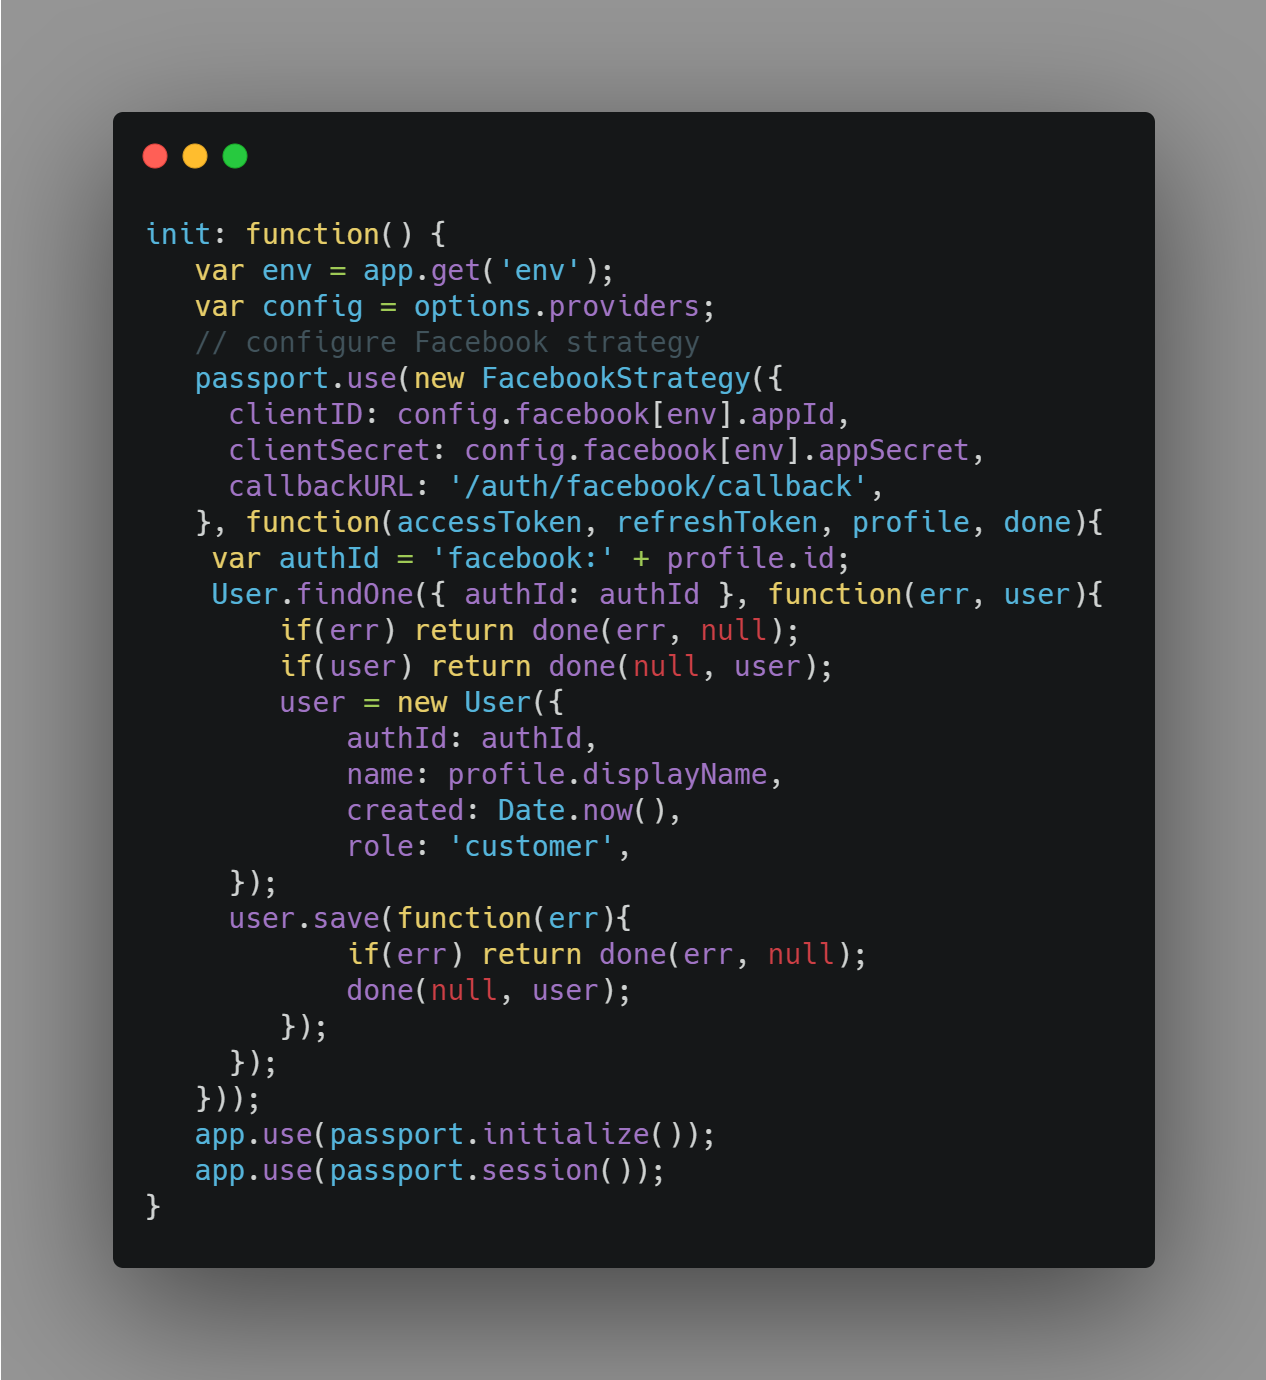
The appId and appSecret is what you will get from Facebook. Next, we’ll be implementing init() function, don’t worry this code is almost similar to the Passport boilerplate. When the user gets authenticated the FacebookStratgy function is invoked and the profile parameter contains information about the Facebook user.
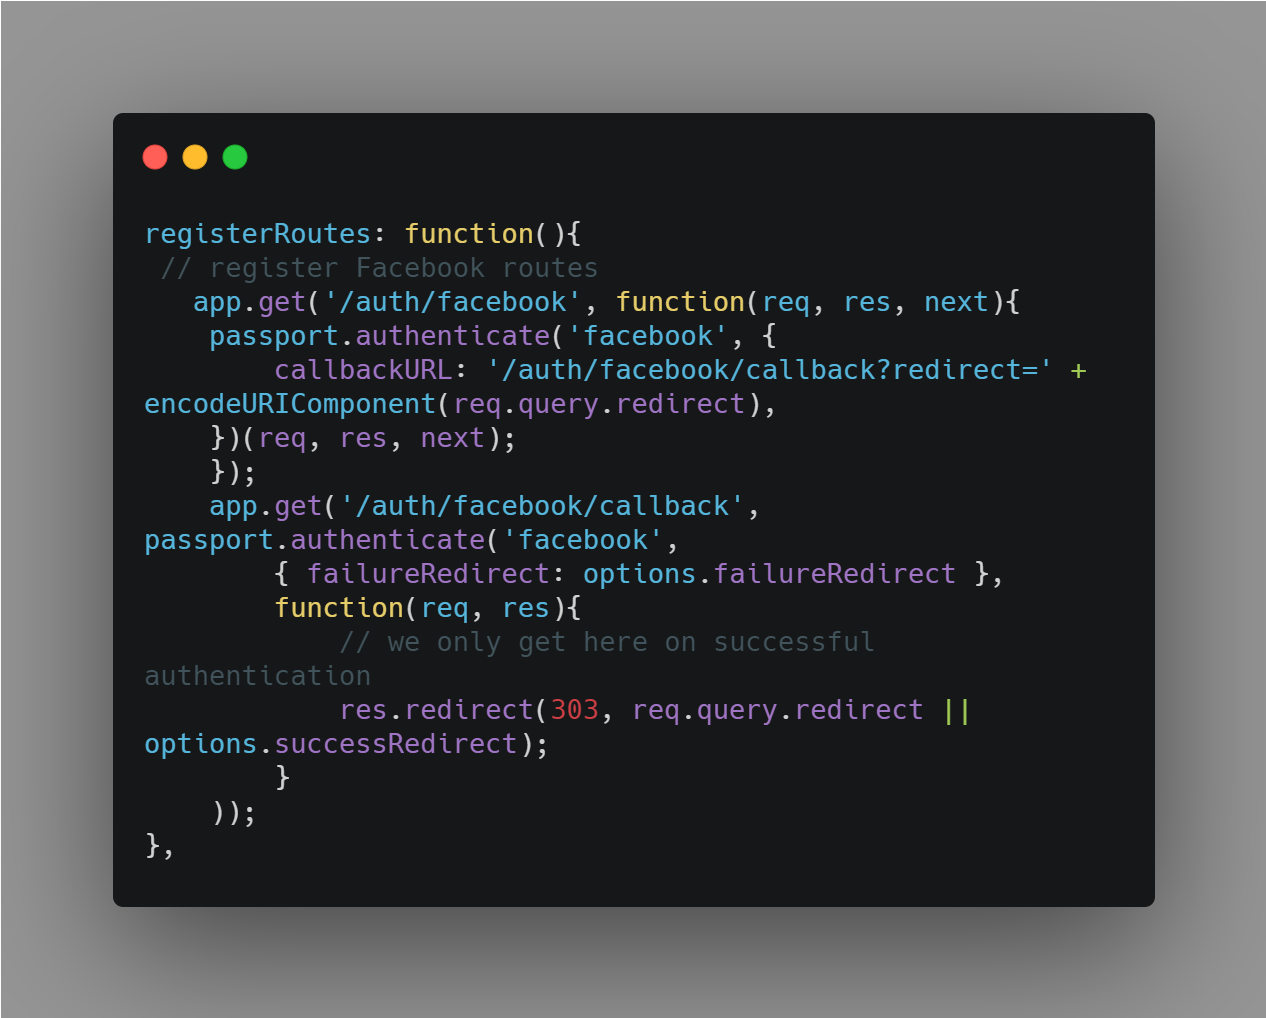
Next, we’ll implement registerRoutes so as to have the path /auth/facebook visiting this path will automatically redirect the visitor to Facebook’s authentication screen which is done by passport.authenticate(‘facebook’). Then we will overwrite default callback URL here: this is because we want to include information about where we came from.
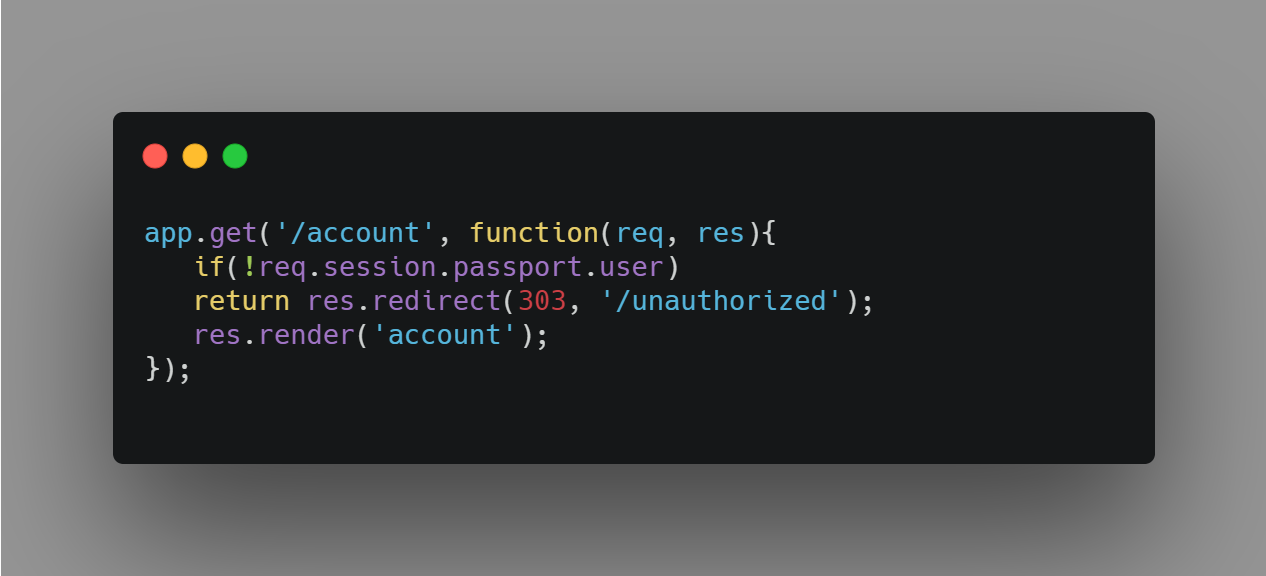
Passport is storing the user to the session and since the browser is redirecting, which is a different HTTP request, we wanted to check if the user is authenticated or not. Once the user has been successfully authenticated, req.session.passport.user will be set. Lastly, we’ll look at /account handler, to make sure the user is authenticated or not. If not, we will redirect it to the “Not Authorized” page.
This is how you implement a authentication in Express application using Passport JS. There will be multiple strategies that you can implement to provide the user multiple options for authenticating and since the code will be pretty much the same only the strategies will differ, you won’t much problem.
Comments
Post a Comment